THE NEXT GENERATION OF COMPUTING

The ComputerManiac is for those who are Craze about computers.

HACKERS ARE HERE

ComputerManiac is connected to the ChennaiHackers community.

FIND EVERYTHING HERE

Feel free,This the platform for computer experts.

JOIN US

CONNECT WITH EXPERTS TO BECOME AN EXPERT

ASK US

FEEL FREE TO REACH US

Wednesday 25 December 2013

Remove Write Protection from PenDrive


 Remove Write Protection from PenDrive


In most of the USB based flash/pen drives, write protection is provided via the small notch. First of all look for it in sides of your drive. It’s even marked with lock/unlock symbol. Move/slide the notch to unlock position (means releasing write protection) before you perform any file operations in your drive such as copy/paste/format etc. After that you can slide back the notch to lock position safely.But many of the pen drives don’t provide hardware lock/notch for write protection. Instead they back it up by means of some software/tool. From there you can change the write protection lock/unlock option. Refer to your pen drive’s manual for more details in this regard as different pendrive have diferent ways to to unlock them or otherwise you can also take help of some tools to unlock them.Best Methods To Remove Write Protection From Your Memory Sticks / Pen Drives Goes here (ENJOY AND POST FEEDBACKS TOO)

METHOD #1 
  1. Open Registry editor of your PC
  1.  For this you should type command “regedit” on run.
  1. Successively navigate to following linkHKEY_LOCAL_MACHINE\SYSTEM\Currentcontrolset\control\storatedevicepolicies( Note: if you can’t find “ storatedevicepolicies ” after “control” folder then you need to create it. For that follow instructions       mentioned below )
  • Open a new note pad file.
  • Copy this
  • cd\reg add “HKLM\System\CurrentControlSet\Control\StorageDevicePolicies” /t Reg_dword /v
  • WriteProtect /f /d 0
  • save it as DISABLEWP.BAT
  • Then copy it to start up folder.
  1.  In right side u will be getting writeprotect option, just right click that and modify the hexadecimal value from 1 to 0
  1. Restart your PC and enjoy!!!!
  1. ( Still having problem???   Don’t worry try other methods below )
( Still having problem ?   Don’t worry try other methods below )============================================================================================
METHOD #2If you have transcend pen drive infected by 9u.exe which is a write protect virus then the following works like a charm:1) Download JetFlash online recovery from:www.transcendusa.com/Support/DLCenter/Software/OnLineRecovery.exe2) Run the program3) Specify the capacity of your drive eg.512 MB, 1 GB …..etc4) Choose “repair and erase all data” OR ” repair and keep existing data”5) Progress bar starts…….completes6) Notification appears —” format complete”7) Unplug and plug your drive and …..prestoenjoy!!!!============================================================================================
Method #3 1. Start > Run  -> type “CMD” and press enter2. type< diskpart3. type< list volume4. type< select volume # (# is the number of the USB HDD you’ve pluged in)5. type< attributes disk clear readonly(If you need help while typing commands then type “HELP FORMAT” on command prompt)============================================================================================
METHOD #4 There are a series of options in the Group Policy Object Editor that deal with read/write permissions on hard drives and removable media.  I basically changed their individual settings from “Not configured” to “Disabled”.Start -> Run… -> gpedit.msc -> OKComputer Configuration -> Administrative Templates -> System -> Removable Storage AccessIn here I disabled all of the “Deny read access/write access” options; you may only want to disable the ones relating directly to the type of media that you want to access.Here are the ones I changed:Removable Disks:  Deny execute accessRemovable Disks:  Deny read accessRemovable Disks:  Deny write accessDouble-click each one and select the ‘Disabled‘ radio button.Do the same as above, except the first step is “User Configuration” instead of “Computer Configuration

Friday 24 May 2013

Unlock android phone from pattern lock

Unlock android phone after too many wrong pattern attempts


This has been a common problem with most android users that, someone(while playing with their cellphone) activates the lock by drawing wrong unlocking patterns, leading finally to a window asking Google account
User name and password. I recently got screwed up, as the kid living next door tried unlocking my phone. If wrong pattern is entered 20 times, the Android OS locks your phone with a "TOO many pattern attempts" message and asks for your Google account name and password.

Now there are various reasons for which people can't come out of this situation -
  • Either they don't know the ID/Password.
  • The Packet Data is not activated, so even if right ID/Password is entered, it wont help.
  • The Internet setting of respective Network Service Provider is not installed.
It was a hard time for me to swallow the truth that, MY PHONE WAS LOCKED, as the account in the phone was of someone else's. I googled the solution for this, but found unusefull tricks unlocking the phone as they needed the phone to be in USB Debugging mode. But, somehow, i managed to find a solution to this(though it was done accidentally). If you go at any mobile shop they take ample amount for doing simple steps for unlocking it. I will tell you what they do. You need to follow some simple steps. I have tried the technique on Samsung Galaxy Y (Young). Probably it may work on all android devices

Note - this method involves wiping off all data on your phone, including installed apps and the setting you have done.
  1. Turn the phone off the phone
  2. Long press the upper volume key, menu key and the power key simultaneously
  3. relieve for a fraction as soon as you see the screen display in "Samsung Galaxy Y young" again press the 3 keys simultaneously
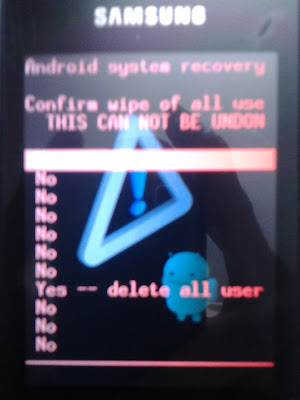
  4. Now you will see a screen displaying "Android system Recovery"


    5.  select the 3rd option("Wipe data/factory reset") using the volume keys and press the centre menu key


    6.  select the "Yes" option again using the same keys.
    7.  after some time, it will say, the reset is done
    8.  just select the reboot option and your phone is UNLOCKED.
Though it will wipe all your data,i find it relevant as it saves some of your bucks.
It's done...!!!

Qt Installer 4.7.4

Qt Installer 4.7.4 For Nokia

Ä°mage


Qt (kyut) - aset of libraries needed to run some games and applications that are written with Qt Tools programming language C + + . At the moment, has developed programs and games with Qt in the future as you understand the absence of these packages will lead to the game or program will not run or will not work. QT Installer - installs all necessary components (19 libraries) for smart phones. Also in there QT Mobility assembly which is required for some programs. A more detailed description of the instructions in the assembly.

Basically in this release bug fixes May Qt 4.7.3

Additional enhancements:
- enhanced support Qt Quick Components 1.1
- Improved graphics: OpenGL ES-optimized memory management, GPU, several optimizations OpenVG engine
- Support for fast change of orientation
- support copy / paste the editors

http://icons.iconarchive.com/icons/mysitemyway/clean-3d/256/glossy-3d-blue-orbs2-105-icon.png 
Download here

Unlock Android phone

Unlock Android phone after too many pattern attempts

Unlock Android phone that is locked after too many pattern attempts. I've seen the question so many times in the Google Mobile Help Forum that I felt that a post could help someone out.
 
Pattern lock


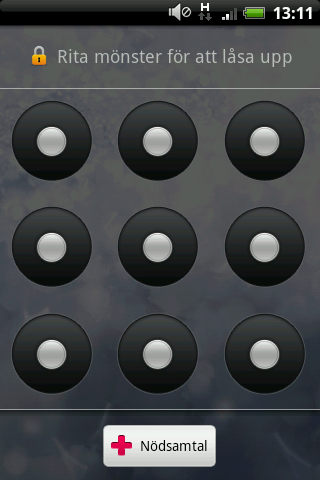
The pattern lock screen (in Swedish)
On Android phones you can activate a feature called pattern lock. This feature can be compared to a Windows computer asking for password after the screen saver kicked in, only instead of a password you use a pattern. You get a screen with 9 dots and you draw a pattern of your choice with 4 of them. If you forget your pattern (or have kids that likes to play with phones) you will after 3 faulty attempts be unable to use the pattern to unlock it. Instead you are asked for your Google account and password (that is setup with the phone of course). This is where the problem starts.
For many, many users providing the username and password won’t change a thing. For some people changing the password via a computer has worked but that is uncommon. Most people ends up with a very expensive paperweight. Have no fear, there are solutions to almost everything!
Update
Some workarounds to try before reading ahead:
1. try entering null as password. (together with your google username)
2. try entering your username without @gmail.com
3. Combine 1 and 2
4. Call yourself from another phone, answer, without hanging up press the home button, then menu button, settings, try to disable pattern-lock
5. Call yourself from another phone, answer, hang-up, directly after hanging up start pressing your buttons like a madman for <30-60 seconds ending with your home button (might take a while to get the timing right). Go into settings and disable pattern-lock.
6.  Try the normal recover password routine from GMail.com and start over from 1.
7. Perform a factory reset. YOU WILL LOOSE all not-synced DATA (SD card will be left untouched).
1-6 are possible workarounds, these doesn't work for everyone but can be worth a try to avoid factory reset. 6. is what should work but hardly never does. 7 - The factory reset always work
End Update
In this case the solution is to make a factory reset (sometimes referred to as hard reset or wipe). This will erase all data on your phone (not on your SD-card). Your contacts and mails should be in sync with the Google servers, no problem there then. Downloaded applications needs to be installed again but there is a list of your previous downloads in the Android Market->My Downloads. Other things though are lost if you haven’t backed them up manually with a 3-rd party application. Example on things you will lose: Call logs, text messages, application settings.
This is your 3 step solution
  1. Factory reset your phone (links to Android device manuals can be found below, it differs between devices)
  2. Setup your phone just like you did the first time you unpacked it (use the same Google Account if you want your old contacts back!)
  3. Restore any manual back-ups and install your previous applications from the My Downloads list.

Tuesday 9 April 2013

AutoCAD 2013 full Version


AutoCAD 2013 Free 32Bit and 64Bit with Crack


AutoCAD 2013 New Features
Section and Details View:
 A new model documentation tab provides easier access to tools for creating Section and Details views. Choose from common section methods including Full, half, offset, and aligned. Specify circular or rectangular boundaries for detail views. Constrain section lines and detail boundaries to key points in the drawing views to help maintain fidelity even as the model or layout change. Maintain consistency across multiple section or detail views with customizable view styles.

Strike Thru Text:
A new strikethrough style is provided for Mtext, Mleaders, Dimensions, Tables and ArcText offering increased flexibility for representing text in your documents.

Autodesk 360 Connectivity:
A tight connection with Autodesk 360 allows you to synchronize files.  This includes syncing drawings and folders with your online account directly from within AutoCAD software. www.muhammadniaz.blogspot.com  You can export and attach files directly to your single sign-on account and share files with others via your Autodesk online account.

Customization and Support File Sync:
You can easily share and access your AutoCAD customization preferences and support files to travel with you as you move from one machine to the next.

Social Media Sharing:
Share your AutoCAD designs with your social world using built-in connections for Facebook and Twitter.

System Requirements:
Processor: Intel Dual Core 2.0GHz
RAM: 2GB
Size: 1.24GB


Instructions:

1. Install Autodesk AutoCAD 2013
2. Use as Serial 666-69696969, 667-98989898, 400-45454545 066-66666666 .. or anything matching those templates
3. Use as Product Key 001E1 and Finish the installation.
4. Go to Crack folder and Copy Crack file and Paste into install Directory.


::..Torrent Link..::


Download torrent here


Sunday 7 April 2013

ESET NOD32 LiveCD-LiveUSB


ESET NOD32 LiveCD-LiveUSB V7918


Download ESET NOD32 LiveCD-LiveUSB v7918 [22.01.2013]

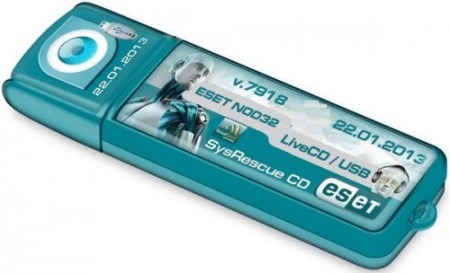
ESET NOD32 LiveCD/LiveUSB v7918 [22.01.2013] | 205 Mb

ESET NOD32 LiveCD / USB – an anti-virus boot disk on the basis of Linux and of ESET NOD32 Anti-Virus that allows guaranteed to remove viruses, potentially dangerous files and sophisticated malicious software, which can not be rendered harmless in normal operation of the operating system Windows.Krome addition, ESET NOD32 LiveCD can also recover Windows system in case of failure or damage due to viruses.

To create ESET NOD32 LiveCD / USB need to download an ISO-image eset_sysrescue.iso and burn it to a CD / DVD-ROM or USB-flash drive, consistently performing steps according to the instructions.

The procedure to download ESET NOD32 LiveCD
1). Download the ISO image of the LiveCD.
2). Burn the ISO image to a CD-ROM
- Added “boot disk ESET» on CD (DVD)-ROM:
In Windows 7/8 is the ability to record disc images in ISO format regular operating system tools. If you use another operating system Windows, you have to use additional software to burn ISO-images (many of which are free).

• In Windows 7/8 to record ISO-image to a CD (DVD)-ROM, follow these steps:
- Right-click on the file do with the extension. Iso and choose the option “Open with” -> “The writer is a disk Windows»;
- When the dialog opens burning, you need to select the drive you will
used for recording, insert the disc;
- Press the “Save”. After some time, depending on the file size of the image and ISO-speed recording, the disc will be ready and you can use it for other purposes.
2 a). or USB flash-drive with ESET Live-USB Creator (present in the archive):
- Enter the path to the image file;
- Specify the USB flash-drive, which will be made a record of the image;
- Click the “Create a USB». Wait for the window “Create ESET-Live-USB complete.
3). Include in the BIOS to boot from CD / DVD-ROM or USB flash.
4). Put in a CD with a recorded manner LiveCD or USB flash-nakopitel.v USB port.
5). Restart the computer.
6). Wait for the drive and start cleaning the system from viruses.

How to download ESET LiveCD:
1). ESET live-CD Graphics mode – this shows how to download a full desktop where you can run a scan on your computer, go online and take other actions;
2). ESET live-CD Copy to RAM – this way to download all the files first copies the disk into memory, and then will load in the first mode, working without the CD (DVD)-ROM or USB flash-drive;
3). ESET live-CD Text mode – this way of downloading allows you to work from the command line;
4). Run Memtest utility – this method will run the load test the computer’s memory for errors.

The best way is to download mode «ESET live-CD Graphics mode» – this involves a complete desktop and you can run a scan on your computer.


 Download here


Chat with your Facebook friends without logging


Chat with your Facebook friends without visiting Facebook


Use Facebook chat with these free online tools
            Wondering what it is? Connecting you to your Facebook friends without even having to open your Facebook account. When you chat with your Facebook friends, you don’t need to install any IM software but you need to be logged into your Facebook account. What if the latter condition is not necessary? You are free to access the Facebook chat from anywhere without opening the site in your browser (especially in the Access Denied zones).


Chat using the browser

            Whichever browser you use, may be Chrome or you might have prism for Firefox, just open this address in the address bar of your browser and then create a shortcut for Facebook chat application on your desktop.

            If the Firefox users wish to use this Facebook chat application from the sidebar, then they can bookmark the above given link and the “Load this bookmark in sidebar” property of the bookmark to true.
If you use IE and you pretty much hate to use the Facebook chat from the sidebar, then you can try Gabtastik- it is a minimal desktop client for Facebook looks same as the web version of Facebook chat. Although, it sends you notifications through the system tray.

Another very interesting web based service for instant messaging is Meebo, it also supports Facebook chat now. You can use the Facebook connect service to connect your Facebook account with Meebo and start chatting instantly with your online buddies. Well, this is the one I most like because you can use this to chat with your Facebook friends even if the main site is blocked in your organization. Also, you can simultaneously connect to your friends on other networks.

Chat from desktop

ChitChat


Don’t you wish you could have something like Yahoo messenger or gtalk for your Facebook? If yes, then ChitChat is for you.ChitChat provides you with a tabbed window from which you can talk to many friends at once. It notifies you when your friends become online or offline. But it is only a Windows app, moreover in its RC stage, so you got to empty your pocket.

Digsby


Digsby for Facebook Chat
It is an all-in-one package. You don‘t have only your Facebook here, but also twitter, gmail, Linkedin and other such accounts.

It has an interesting feature like if you have multiple Facebook accounts, suppose you and your partner, then this allows to associate your multiple accounts and lets you chat with a combined buddy list. Also Facebook does not let you make any audio/video calls but Digsby makes it possible via Tokbox.

Adium


Adium , a tool for facebook chat
I did not talk about Mac till now, so for buddies using Mac, you have Adium. Like Digsby, Adium also allows you to connect to multiple I'm networks like Twitter, Windows Live Messenger, Skype, AIM, AOL, ICQ, Google Talk, Yahoo! Messenger, Skype and Jabber (XMPP).


Pidgin


Pidgin for facebook chat
Although the Facebook chat is not officially allowed in pidgin but it uses a free plugin that helps you connect to your Facebook chat about it. As inDigsby, pidgin also allows you to operate your multiple Facebook accounts and chat with buddies simultaneously.


So, Pidgin or Digsby?

Well, Pidgin is just for instant messaging whereas Digsby also notifies you when a friend writes something on your wall or you get a message from Facebook email. Also, Pidgin shows all your contacts together in a big single list while Digsby group your contacts in heads as you have in the original Facebook site.

Add Background Wallpaper on Pendrive


Add a Background Image on your USB Pendrive


Katrina Kaif as Background Image in Pendrive
Are you bored looking at the same old white screen when you open you Pendrive. Now is the time to change the look of any drive by setting a wallpaper in its directory. Just follow the simple copy paste steps and you would have a Background Image on your Pendrive.

Just follow the simple steps to set a Background Image on your Pendrive

1. Select an image on your computer which you want to appear as background image.

2. Rename that image to wall.

3. Now copy and paste the image to your Pendrive.

4. Now create a new notepad file and paste the following code in it.

[ExtShellFolderViews]    
{BE098140-A513-11D0-A3A4-00C04FD706EC}={BE098140-A513-11D0-A3A4-00C04FD706EC}    
[{BE098140-A513-11D0-A3A4-00C04FD706EC}]    
IconArea_Image=wall.jpg

5. Save the file as desktop.ini in your pendrive and change the save as type to all files

Easy Steps to Apply a Wallpaper in Pendrive

 
6. Now Enter your Pendrive and press F5 to refresh. 

You would see something like this:-
Cool Background Image in any directory


Note: This trick works best on Windows Xp and Vista . Wallpaper could also be set in any other directory like C:, D:, E: etc. Just copy and paste the files in the directory where you want the wallpaper to appear.